 my
myHow to Seal a Shower Tray
Are you looking for information on how to seal a shower tray? This article will go over everything you need to know about sealing a shower tray, along with a step-by-step guide and lists of all of the tools and materials needed to complete the job.
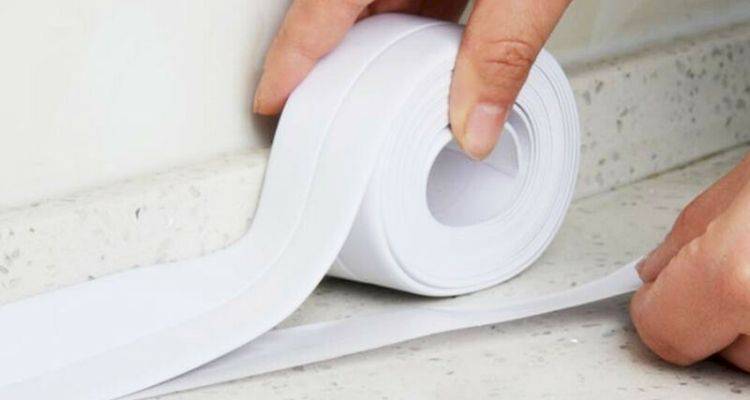
Table of Contents
What Tools Do I Need to Seal a Shower Tray?
Below is a list of the tools you'll need when applying sealant to a shower tray:
- Utility knife
- Plastic scraper
- Caulking gun
- Cloth
- Masking tape
- Sealant finishing tool
What Safety Equipment Do I Need to Seal a Shower Tray?
While you don't need any specific safety equipment when it comes to sealing a shower tray, it is important to consider some basic PPE such as eye protection and disposable gloves. Although if you are sealing a shower tray as part of a wider shower installation you may need to take other precautions, such as turning off the water supply or electrics.
What Materials Do I Need to Seal a Shower Tray?
Below is a list of the materials that you'll need to seal a shower tray, unless you are install a new power shower and pump at the same time - which is a far bigger job.
- Sealant
How to Prepare for Shower Tray Sealing
When preparing for sealing a shower tray, you want to remove the old sealant and dispose of it. Make sure you do this just before applying your new sealant, as you don't want to risk someone using your shower while it isn't sealed.
You should also make sure that the area is clean, dry, and structurally sound before you start the work.
How to Seal a Shower Tray Yourself — Step-by-Step Guide
Follow our step-by-step guide below to learn how to seal around a shower tray:
Step 1
Begin by ensuring the surface in and around the shower is clean, dry, and structurally sound.

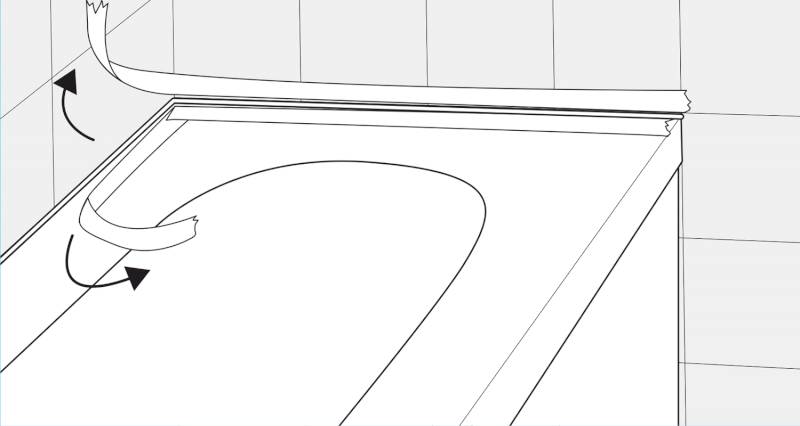
Step 2
Next, you will need to remove any of the old sealant from around the shower tray. You can do this by cutting into it carefully with a utility knife and then pulling the sealant away.
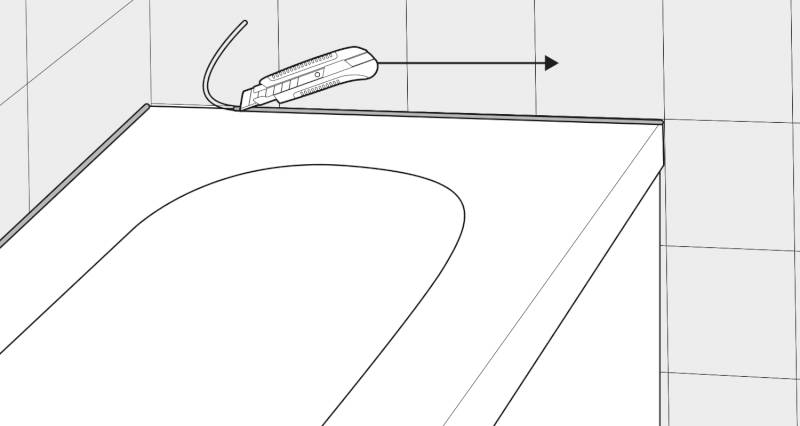
The majority of the sealant should pull away fairly easily by hand. Although if it becomes a struggle, use your knife again or a plastic scraper to pry away the stubborn bits and continue pulling it away until it has all been removed.
Step 3
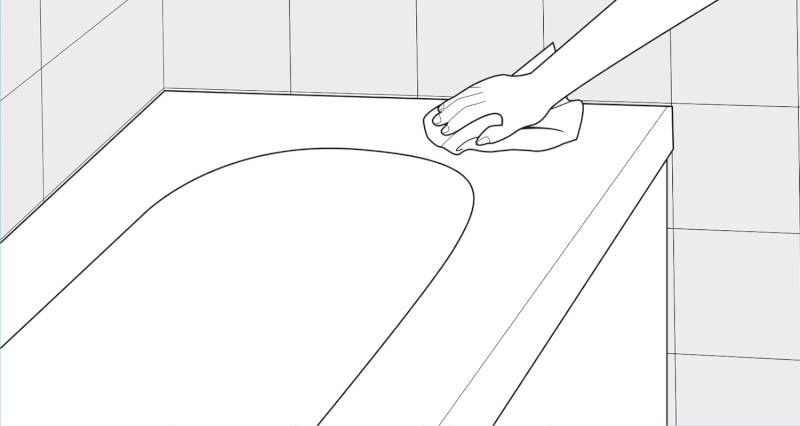
Once you have removed all of the old silicone, clean the entire area and then dry it completely using a cloth.
Step 4
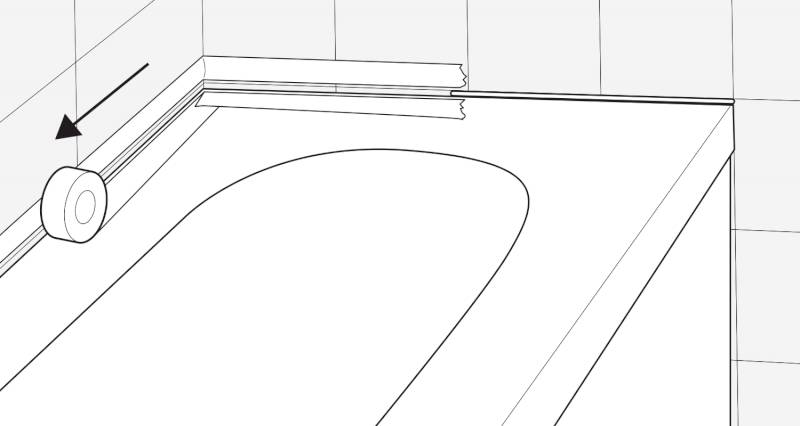
To ensure you get a neat and clean bead, apply masking tape to both sides of the joint to apply the sealant.
Step 5
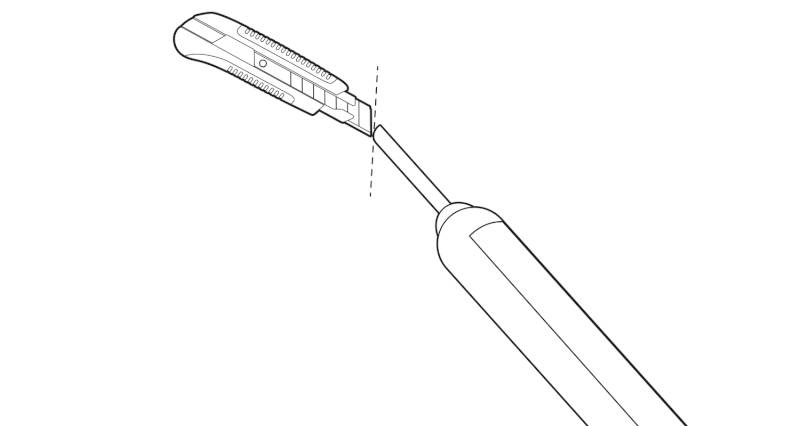
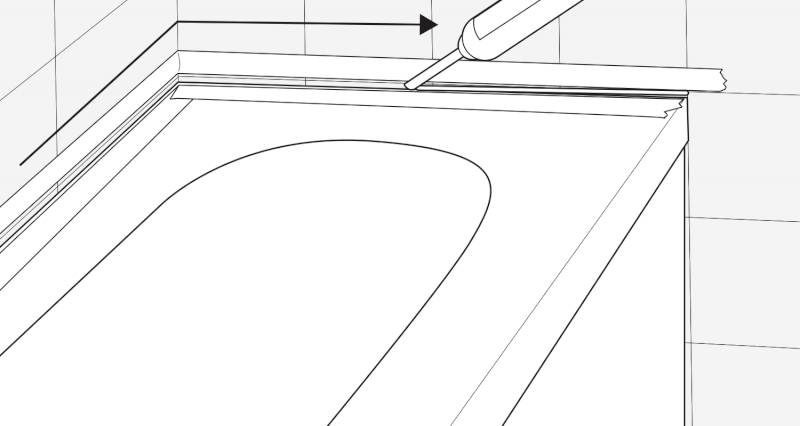
Cut off the tip of the sealant cartridge at a 45-degree angle. You can cut the tip closer to the end of the base, depending on how wide you would like the bead size to be.
Step 6
Fit the sealant tube into a caulking gun. Use the caulking gun and begin to apply the sealant to the desired area at a steady pressure. You should aim to force the sealant as far into the joint as you possibly can.
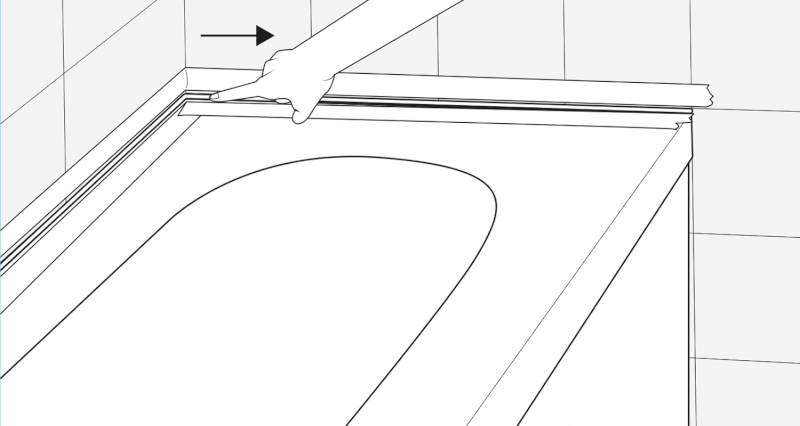
Step 7
Once you've done one section of the beading, wet your finger a little bit and score it across the beading to smooth it out, pushing it further into the joint. Although for a more professional look, it's worth purchasing a sealant finishing tool before you start.
Step 8
Continue the above steps across all of the joints of the shower tray.
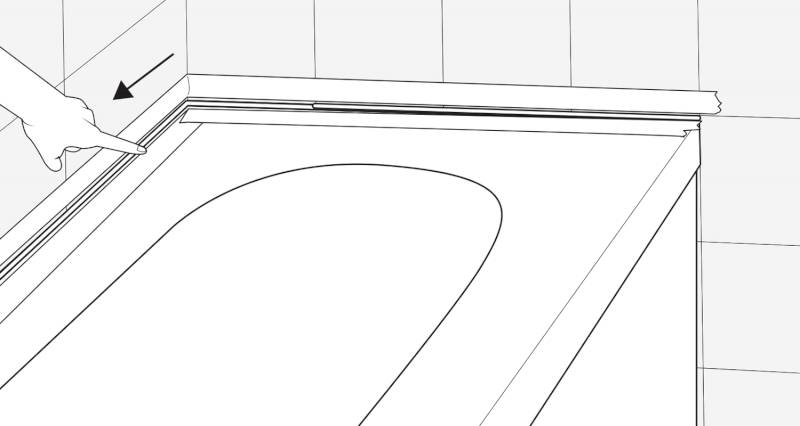
Step 9
Remove all of the masking tape as soon as you have finished the job.
Step 10
It's best to leave the sealant to dry for at least 24 hours before using the shower. Although you should always check the manufacturer instructions as some sealants may be fast-drying, while others may take longer.

Types of Shower Tray Sealant
Below is a list of the three most popular types of shower sealant:
Silicone Caulk
Silicone is very good for sealing showers and is one of the most popular sealant types in the UK. It is very easy to apply and works extremely well at keeping your shower looking fresh and protecting it against leaks. Most silicone sealants come in a tube and can be applied easily using a caulking gun.
Waterproof Caulk
Most caulks are great at preventing leaks. However, even the smallest bit of water can cause a big problem. Waterproof caulk can provide even more protection against water than other types of caulk. It can also provide protection without degrading due to prolonged water exposure. This is what makes waterproof caulk a popular option for showers in the UK.
Coloured Caulk
If your shower is a different colour from the traditional white shower, then you may want to find a caulk that matches the colour of your shower. This is where coloured caulk works great as you can colour match your sealant to your bathroom's aesthetic. It provides the same amount of protection as other caulk types but also looks great on coloured showers.