 my
myNest Thermostat Installation Cost
At a Glance
- The average cost of installing a Nest thermostat is £180.
- It takes roughly 30 minutes to 1 hour to install.
- A breakdown of Nest installation costs, from supply only to full installation.
- How long installation will take, as well as other smart home upgrades you can consider at the same time.
- How to find and hire a local electrician to fit your Nest thermostat.
Looking for the cost to install a Nest thermostat?
In this guide, we'll reveal all you need to know about the types of Google Nest technology on offer, as well as the cost of labour to have it installed and what other smart home upgrades you can have done at the same time.
Already bought your Nest thermostat and just want an electrician's quote?
Look no further. MyJobQuote has thousands of professional electricians near you ready to make you a free, no obligation quote.
Or, to learn more about Nest costs first, keep reading.

£180
Table of Contents
- How Much Does Nest Thermostat Installation Cost?
- Nest Thermostat Cost (Supply Only)
- Additional Nest Thermostat Installation Costs
- Nest Thermostat Labour Costs and Timescales
- What Impacts the Cost to Install a Nest Thermostat?
- What's Involved in Installing a Nest Thermostat?
- How To Install a Nest Thermostat
- Building Regulations & Planning Permission for Installing a Nest Thermostat
- Types of Nest Thermostat Systems
- Checklist: Hiring an Electrician for Nest Installation in the UK
- FAQs
- Sources
How Much Does Nest Thermostat Installation Cost?
Considering installing a Nest thermostat?
Nest, a division of Google, have created smart thermostats and gadgets that can be controlled remotely via a smartphone or tablet. Together with homeowners installing smart meters, they're becoming commonplace in homes across the UK for their energy and cost-saving benefits.
So, what is the cost of installing a Nest thermostat?
Nest thermostats usually cost around £160 to £200 to install. For supply only, Nest thermostats cost between £199 and £219.
If you want to complete your smart home, adding a Nest Doorbell is a great option. The price of Nest doorbells ranges between £179.99 to £229 depending on your choice of wired or battery-powered.
Nest Thermostat Installation Prices
Take a look at the table below for the average Nest installation prices:
| Job | Cost |
|---|---|
| Installation | £160 – £200 |
| Nest Thermostat (Supply only) | £199 - £219 |
| Nest Doorbell (Supply only) | £179.99 – £229 |
Want a custom price?
Post your job
Nest Thermostat Cost (Supply Only)
How much is a Nest thermostat?
A standard Nest costs between £199 and £219. Depending on the model you choose, your Nest prices can differ.
Nest Learning Thermostats cost £219. After using this thermostat for a week, it will recognise your living habits and control your heating intuitively so that it's on when you need it and off when you don't. Since 2011, Nest estimates they have saved over 39 billion kWh of energy from this innovative technology.
The Nest Learning Thermostat also has home/away assist software that automatically regulates the temperature after you leave the house. For example, if you leave the house for an extended period, you will turn off your hot water tank until you return.
The slightly lower priced Nest thermostat - the Nest Thermostat E - costs £199. This model doesn't have learning capabilities, but you can control it using a remote control, smartphone or tablet, laptop, or by voice using Google's Alexa assistant.
You can see these Nest prices illustrated in the table below:
| Supply | Cost |
|---|---|
| Nest Learning Thermostat | £219 |
| Nest Thermostat E | £199 |
Want a custom price?
Post your job
Extra Costs If You're Installing Yourself
Let's now look at the tools and equipment you'll need to install your Nest thermostat yourself:
| Supply | Cost |
|---|---|
| Phillips Screwdriver | £6 – £10 |
| #2 Phillips head screwdriver | £2 – £10 |
| Power Drill | £40 – £50 |
| Spirit Level | £6 – £9 |
Want a custom price?
Post your job
The primary tool you'll need is a Phillips screwdriver, which should come with your Nest thermostat and costs between £6 and £10. To unscrew your existing thermostat, you'll also need an appropriate size and type of screwdriver. If this is a different size to your new thermostat, you may need a #2 Phillips head screwdriver, costing £2 to £10.
If you're mounting your thermostat on the wall, you'll need a power drill. These typically cost between £40 and £50. Lastly, a spirit level is required to ensure that your Nest is straight and perfectly placed. This will cost you between £6 and £9.
Additional Nest Thermostat Installation Costs
When you install a Nest thermostat in your home, you may decide to add a few more smart features to your home. In this section, we'll go through the additional costs that can come up during installation.
Smart Lighting
Once you've started incorporating smart home features, you'll quickly realise there are lots of optimisations you can make to help your home run smoothly. Smart lighting is just one of those.
The cost of smart lighting depends on the scale of your installation, with new smart bulbs costing £50 to £100, whereas kitting out your entire house with smart lighting can range from £3,200 to £10,5000 depending on the size.
New Boiler
The cost of installing a new boiler can vary depending on several factors. Boilers are typically replaced due to a fault, but they can also be replaced to improve energy efficiency.
For example, if you replace your old boiler with a high-efficiency boiler with advanced heating controls, you could save up to £300 per year on your home's energy bills. A new boiler costs between £1,500 and £3,500, including installation.

Replacing a boiler is not a simple task and is not a do-it-yourself project. Gas boilers are subject to stringent safety regulations regarding replacement and maintenance, and you must have a Gas-Safe Registered engineer to complete a boiler replacement.
Remove and Replace a Radiator
Expect to pay around £80 to £120 to remove a radiator, whereas the average cost to replace your radiator with a new one is £200. Remember that different styles will cost more!
Steel, cast iron, and mirrored radiators are among the most expensive, with large designer models costing up to £700. On the other hand, a basic single-panel central heating radiator will cost between £20 and £40 without installation.
Rewiring a House
The average cost of rewiring a house ranges between £2,000 and £10,000. This price includes both material and labour costs.
The overall cost will be determined by the property type, the quality of existing wiring, as well as the complexity of the installation. The final budget will heavily influence labour costs and the electrician's qualification.
A flat or maisonette is the most cost-effective property to rewire. This is due to the smaller size, the need for fewer materials, and the shorter time needed to complete the work. Prices for completely rewiring a flat or maisonette start around £2,000 and can reach £5,000.
The materials alone for a two-bedroom house requiring a standard electrical system will cost around £800, and if the property has three bedrooms and requires a greater number of power outlets, the costs for materials will typically be £1,000. The installation typically takes about five days to complete.
The cost of rewiring a three-bedroom semi-detached house starts at £5,500 and rises to around £7,000 depending on the asset dimensions, number of rooms, and complexity of the electrical system required.
The material alone will cost around £1,000 to £1,250 for a standard medium semi-detached house with two bedrooms and a standard electrical system.
The average cost of rewiring a detached four-bedroom house starts at around £5,500 but can easily rise to around £9,000, depending on the property dimensions, the number of rooms within the property, and the complexity of the electrical system required.
The material alone will start at around £1,200 for a standard large, detached house with three bedrooms requiring a standard electrical system.
Also, if the property has four or more bedrooms and requires a higher number of power outlets, the costs for materials will usually be £1,600. The installation will typically take around nine days to complete.
External wiring is another common type that may be required during a full rewiring.
CCTV
The cost of installing CCTV is determined by the system you select. The main price factors are the number of cameras and the type of system you select.

The cost of a multi-camera system ranges between £350 and £1,700. Installation costs for a single security camera can range from £70 for the camera and installation to £2,500. The average cost is around £350.
PAT Testing
PAT testing costs between £1 and £3 per item. However, if you have a variety of items that must be tested, you may be able to get a discount. Some businesses could charge an hourly rate, which could range between £40 and £60.
Many businesses will charge a flat rate for the initial batch of items, followed by a small fee for each additional item. Keeping this in mind, you should budget for both types of fees.
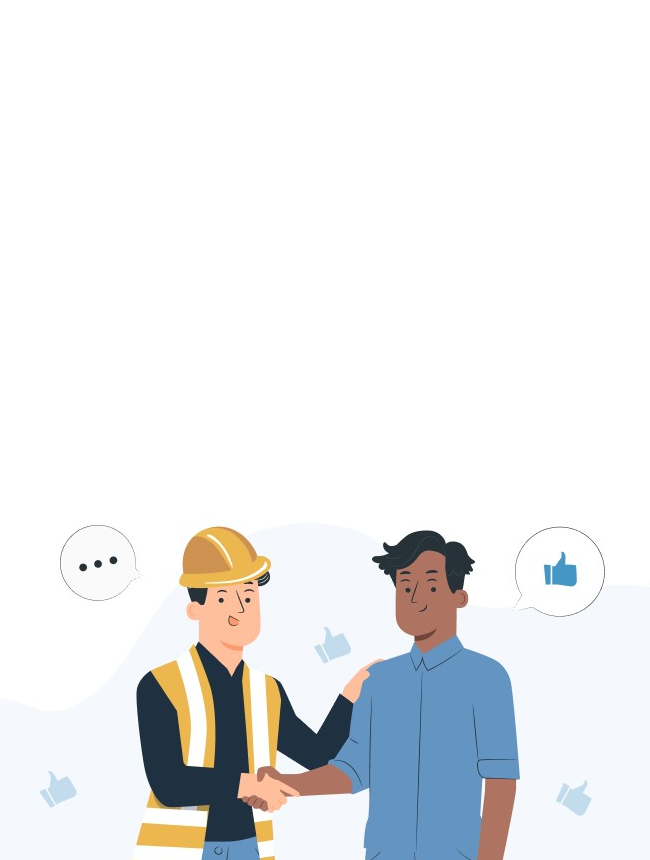
Nest Thermostat Labour Costs and Timescales
Nest installation requires an electrician to come into your home and install this for you. We'll review the various labour costs and timescales for installing Nest, so you know what to expect once an electrician comes to your house.
Electricians can start charging in one of two ways: a set fee for a particular job or even an hourly rate that includes everything they need to do in each period. Most electricians prefer to price per job, but an hourly rate for an electrician is a good cost benchmark.
The average hourly rate in the UK is around £40 per hour, but this varies based on where you live, with London and the southeast being the most expensive. Other considerations include the tradesperson's experience working with a trainee and so on.
An electrician could prefer to charge a day rate of about £200 or £250 if a job is likely to take a full day or more. However, travel time and taxes make the first hour more costly than subsequent hours.
Many have no idea what an electrician charges or their rate for a specific job. Although each company and electrician will have their price list for different jobs, it is great to have an idea of how much they charge and how they construct a quote for you.
This can help you determine what they're charging for labour and materials and whether you're being overcharged. Electricians are skilled professionals, and poor electrical installation can be deadly.
Expect to pay around £75 per hour for an electrician in London. Electricians in the south of England will make slightly more than those in the rest of the United Kingdom. There are numerous reasons your electrician's fee may rise, including distance.
If the contractor is required to travel beyond a certain radius, they could charge an extra fee to cover the extra travel costs. You shouldn't have to pay for this unless you live in a rural area or would like to hire an electrician from afar.
Based on the complexity of the installation, it usually takes 30 minutes to an hour.
Ask a Trade
Got a question that only a tradesperson can answer? We have thousands of trades ready to answer any question you may have.
Ask your question

What Impacts the Cost to Install a Nest Thermostat?
Many cost factors could impact the overall cost of your installation. Therefore, here we will go over the different cost factors and how they could affect you.

Location
Nest installation costs vary depending on where you live in the United Kingdom. This provider will be more costly in London and the southeast due to higher business costs, including insurance and business premises.
Although the cost of installing a nest in the north of England, the Midlands, and some country regions of Wales and Scotland will be lower, the cost of installing a nest in some big cities may be higher.
Minimum Fee
Labourers/companies may charge a minimum fee in some cases. This could be incorporated into the final bill or included in it.
So, for example, if you were charged per day, it didn't matter if it took a day and four hours or a day and seven hours as you'd be charged for two days' worth of labour.
New Wiring Required
If new wiring is required, the cost may be slightly higher. That depends on whether you already have a wired thermostat or if you don't mind having your Nest plugged into a socket.
Current Heating System
The installation can be simple or complex, depending on the existing heating system. Older heating systems may have unlabelled and undocumented wiring, making installation time-consuming.
Some locations have the boiler in difficult locations where working could be difficult. If you can tell your contractor the make and model or send photos, they will be able to provide a more accurate quote.
What's Involved in Installing a Nest Thermostat?
If you're installing your Nest yourself, follow the steps to stay safe and connected. Although there are various Nest models, you can install yours by following the instructions below.

A head screwdriver is required before installing your Nest thermostat. Your Nest pack will include one, but you may require another size for the screws that hold your current thermostat in place.
The pack will also include an installation guide, screws, and a trim kit to conceal any holes in the wall.
While Nest thermostats are easy to install in most cases, they require installation by a certified electrical contractor. They will install it in the proper location, connect it to your heating system's power supply, and configure the system.
Before beginning the installation, the contractor will turn off the mains' power and assist you in deciding where to place the Heat Link, which receives instructions from the thermostat. It should be placed away from large metal objects that could interfere with the radio wave from the thermostat to the boiler.
They will then attach the neutral and live wires to the thermal link to create a circuit compatible with your heating system. The heating system can be restarted once the other end of a wire is linked to the boiler's power supply.
Blue light at the Heat Link's top indicates that it is attempting to connect to the Nest. A green light suggests that the connection has been established. When installing the thermostat, choose a room where you spend most of your time, such as an office, living room, or kitchen.
If you don't want the Nest to be attached to the wall, plug it in and place it on a surface. It must, however, be within 2 metres of a power outlet because it must always be plugged in. The Micro-USB cable will be plugged into the power supply and connected to the socket in the rim of the Nest's base.
If you want your thermostat to be wall-mounted, this base can be screwed to the wall, and the Nest is mounted on it.
The only thing left is to set up your Nest account online or via the Nest mobile app. Then, connect the Nest to your Wi-Fi network, install any necessary software updates, and ensure that the Heat Link is linked to the thermostat, boiler, and hot water tank.
You can then use the app to link the thermostat to your Nest account and start controlling the heating from anywhere.
How To Install a Nest Thermostat
These days, smart thermostats are becoming commonplace in many homes. It's easy to see why they're so popular. They are inexpensive, help you save money, and can be controlled anywhere.
So there's no need to stress about forgetting to turn off the thermostat before leaving on vacation. Next, we'll go over whether you can install Nest by yourself or if you need professional assistance.
In most cases, you can install a Nest thermostat without the assistance of an electrician. Nest thermostats are intended to function in homes that lack a common ("C") wire. In rare cases, a C wire or other power-supply item may be required. In these rare cases, an electrician is advised.
It is best to carefully read the instructions before installing a nest. The Nest thermostat compatibility website is the first place to look. It will ask you a few questions about the wiring attached to your current thermostat before determining whether Nest can be used in your home and whether Nest must be installed by a professional.
The Nest was created to be a do-it-yourself project that anyone can complete. The Nest app will walk you through the installation process and notify you when a professional electrician is required. If the wiring is already in place, even the least handy can install a Nest thermostat.
Your Nest should be installed:
- In a frequently used room, Nest can read the correct temperature, and the householder can easily reach it.
- On an interior wall.
- Away from draughts, 12 to 15 metres from the floor, not behind doors, bookcases, or other objects.
Building Regulations & Planning Permission for Installing a Nest Thermostat
No building regulations or planning permission are required for a nest installation, but there are a few guidelines to follow.

In the United Kingdom, the following Terms and Conditions apply to the installation of the Nest Learning Thermostat and Nest Thermostat E.
Before installation, you must obtain all necessary consents, including, but not limited to, permission from a landlord and any permissions required if the property is under a listed building.
Nest and your installer reserve the right to double-check all required permissions before proceeding with any installation. Nest or the Installer will not be held liable if you fail to obtain any required consent.
Your Installer will ensure that the Nest thermostat is suitable for your home before beginning installation. If the Nest thermostat is inconsistent, contact your retailer for return instructions.
Nest Learning Thermostat: Your Installer will consult with you and agree on the best location in your home for the Nest Learning Thermostat to be installed. Once agreed upon, your installer will install the Nest Learning Thermostat, Heat Link, and, if desired, the Nest Learning Thermostat Stand.
Nest Thermostat E: Nest Thermostat E will come with a stand and a plug, allowing it to be placed anywhere. Because the Heat Link E is designed to replace your existing thermostat, your installer will do so whenever possible.
If you don't already have a thermostat or an integrated receiver, the Heat Link E will be installed next to your boiler.
Nest disclaims all liability for any damage to your property caused by the installation of your Nest thermostat to the extent permitted by law.
In addition, no liability is accepted if installation services cannot be provided due to factors beyond our control, such as fire, accidents, war, inclement weather, industrial disputes, strikes, and lockouts in which we are not directly involved.
Types of Nest Thermostat Systems
Google offers two smart Nest thermostat models: the 3rd Generation Nest Learning Thermostat and the Nest Thermostat E. While the products appear similar at first glance, there are a few key differences that will help you make a purchase decision.
3rd Generation Nest Learning Thermostat
The more expensive Nest Learning Thermostat is the standard model. The unit is 3.3 inches in diameter and is covered by a polished metal ring that comes in seven different colours, allowing you to match it to your decor.
This Nest thermostat has all the features you'd expect from a smart thermostat, such as learning your family's habits and creating a personalised energy-saving schedule. It also allows for remote monitoring and control using your smartphone and integrates with other Nest devices or Amazon Alexa.
This model has a few unique features that set it apart. To begin, the Nest Learning Thermostat 3rd Generation is suitable with 95 per cent of 24V heating and cooling systems, which is more than any other Nest thermostat.
In addition, it has a high-resolution colour display with Farsight technology, which means it illuminates when you walk into a room and displays the temperature, weather, or time. It also has a two-year warranty.
Pros
- Learns to create a schedule
- Compatible with 95% of HVAC systems
- Farsight function
- Works with smart assistants
- Seven colour options
Cons
- Expensive
- Can cause problems in the absence of a C wire
Nest E Thermostat
You might expect fewer features with such a low price, but most of the differences are cosmetic. For example, the Nest Thermostat E has a slightly smaller 3.19-in. diameter and a polycarbonate body with a ceramic-feel finish.
This design is only available in white, with a less vibrant "frosted" display that's supposed to blend in better with any environment.
The Nest Thermostat E has nearly all the same functional options as the Nest Learning Thermostat. However, the E is only compatible with 85 per cent of 24V heating systems, and it lacks Nest's far sight feature. Furthermore, the warranty is only one year.
Pros
- Creates timetable through learning
- Supports 85 per cent of HVAC systems
- Works with smart assistants
Cons
- Supports fewer HVAC systems
- No far sight functions
- Lower display quality
- Only one colour
Checklist: Hiring an Electrician for Nest Installation in the UK
When hiring an electrician to install your Nest, it is important to ensure they are the best to avoid any mistakes. So here we will go through our checklist for finding the best contractor to install your Nest.

Word of Mouth
Asking around is the best way to find an electrician. A suggestion from someone else is like gold dust, whether from friends and family or a social media shout-out. If someone you know has used an electrical engineer and was good enough to warrant a recommendation, you know they're well, especially if you can see their work for yourself.
A Person with Electrical Competence
If no one can recommend anyone, you should visit the Registered Competent Person Electrical search facility. All electricians on this register have had their work evaluated for quality, so this is the next step in your search for a respectable electrician.
Get At Least Three Quotes from Electricians
Obtain at least three quotes from at least three electricians and ensure that your quote is divided into the actual work the electrician will be doing, the time it will take to complete the job, and any material costs.
Take advantage of this time with the electrician to analyse them. Consider the following:
- Do they have relevant electrician qualifications and certifications?
- Do they arrive on time?
- Is there a van with a logo and a phone number?
- Is this a written or verbal quotation?
- Is there a guarantee on their work?
Remember, if your gut instinct tells you something isn't right, walk away and look for someone else.
FAQs
How Do You Set Up a Nest Thermostat?
After installing and turning on your Nest, you'll need to connect it to your household Wi-Fi network. Then, simply use it like any other thermostat from there. Nest will learn your routines and adjust independently after a few days.
Physical installation is only one aspect of the process. Connecting your smart thermostat to your phone adds a lot of "smartness." Simply download the Nest app and sign up for a Nest account. You can then use your smartphone (or laptop) to change the temperature and monitor your energy consumption.
How Do You Reset a Nest Thermostat?
Select "Restart" or "Factory Reset" from the "Settings" menu. Your thermostat will prompt you to confirm your selection. After you confirm, your thermostat will restart or reset for a few moments.
How Do I Connect my Nest to Wi-Fi?
Here are the steps you need to take to connect your Nest to your home's Wi-Fi:
- To access the menu, press the ring on the Google Nest.
- Choose "Settings"
- Select "Network" by turning the ring
- Choose your wireless connection (it may take a moment for your network to appear)
- Enter the password for your home Wi-Fi
- Choose "Done"
Does Nest Work With Alexa?
Yes, your Nest device can communicate with Alexa to regulate your Amazon Echo speaker through voice commands. Alexa is compatible with Nest video doorbells, thermostats, cameras, and other devices. However, now, the Nest home safety system cannot be connected to Alexa and must be managed manually through the Nest app.
What Are The Benefits of Having a Nest?
Here are the main benefits of Nest installation:
- The Nest Learning Thermostat will analyse your usage patterns and then adjust your home settings automatically based on these patterns
- Remote control
- Recognise when you're at your most productive
- Continuously monitor your home
- Save money on energy bills
Sources
https://nest.com/uk/legal/installation/thermostat/
https://support.google.com/googlenest/answer/9274936?hl=en
https://myintelligenthouse.com/do-you-need-an-electrician-to-install-a-nest-thermostat/